Convert from any Software to with Migration-Tool
Seamless and Secure Data Migration Services
Seamless and secure data migration services ensure hassle-free transitions without compromising data integrity. Aliter Business Solutions specializes in delivering efficient, reliable, and secure migration tailored to your business needs. Trust us to safeguard your data every step of the way.
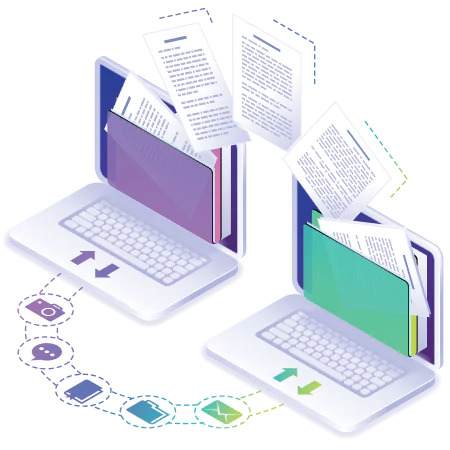
Migration-tool Data Conversion services enable users to transfer their accounting records from a desktop system to an online platform. If you’re considering moving your records to an online version, it’s important to understand the benefits of data migration. In this comprehensive blog post, we’ll take a closer look at these services and their advantages.
Switching accounting software or versions can feel overwhelming, and the risk of data loss is a valid concern. That’s why there is a growing need for seamless, secure, and straightforward data conversion services. Moving your company files from a desktop system doesn’t have to be challenging. With the assistance of a dedicated conversion specialist, you can easily manage the data conversion process. Here, we provide detailed insights on expert-recommended data conversion services.
What are QuickBooks Data Migration Services?
With data migration, your accounting records and statements are transferred seamlessly from one computer, software, or edition to another. While other accounting software may lack certain features, a comprehensive data conversion service can simplify the switch to a platform with enhanced functionalities. Users also have the option to transition from a desktop setup to an online, cloud-based version or move between editions to suit their needs, whether it’s from Pro to Enterprise or vice versa.
In each case, smooth and secure data conversion is essential to ensure that work continues uninterrupted. A specialized data conversion team plays a critical role in these scenarios, supporting a flawless transition of your records. Their expertise can also expedite the conversion process, guiding you through each necessary step efficiently.
Fast, Accurate QuickBooks Data Migration Services
Migration-tool provides premium data conversion services compatible with all major ERP and accounting software. Whether you currently use NetSuite, Intacct, Dynamics GP (Great Plains), Dynamics SL (Solomon), MAS 90/200, Sage Peachtree/Quantum, ACCPAC, or DacEasy, we can transfer your data seamlessly to the platform of your choice. Our expertise ensures a smooth and efficient data conversion experience.
With over 25 years of experience, our team of skilled accounting professionals, database programmers, and software engineers has successfully completed countless data conversions. We’ve developed custom tools for data mapping, cleanup, and conversion that directly connect to your source database, allowing us to extract essential data, perform thorough cleanup, and migrate it to your new system accurately and seamlessly.
Data Migration Tool Checklist
- Leverage the features of your online accounting software to analyze and align with your business needs.
- Although the software offers advanced features such as complex sales ordering, batch transaction processing, advanced inventory management, and inventory costing, the online edition includes a more limited set of features.
- In your online accounting platform, strict character limitations may apply. Adjust any file names that don’t comply with the platform’s naming guidelines to ensure a smooth transition.
- Before converting your company file, ensure you're using a desktop version from 2016 or later. For older versions, update your information and download the most recent version.
- To check the version of your desktop accounting software, open the program and press F2 or Ctrl + 1 on your keyboard. This will display the Product Information Window. To upgrade to the latest version, go to the Help menu and select Update Now.
- Be sure to run your reports and back up payroll data beforehand, as payroll information may not transfer automatically during the conversion process.
- You have 60 days from the date of account creation to utilize “database conversion services” to transfer files from your PC to an online account. If the conversion is not completed within this period, you will need to close your online account and create a new one.
- Resolving any errors in your desktop inventory is essential before proceeding with the data conversion. This step helps prevent data loss and ensures a smooth transition.
Why Choose Migration Tool
Converting your ERP or accounting software can be daunting, especially if you’ve accumulated substantial data over the years, and compatibility between your current software and your new system may not be seamless. If the conversion tools seem complex, don’t worry—experts can handle the migration process securely, saving you time and reducing stress.
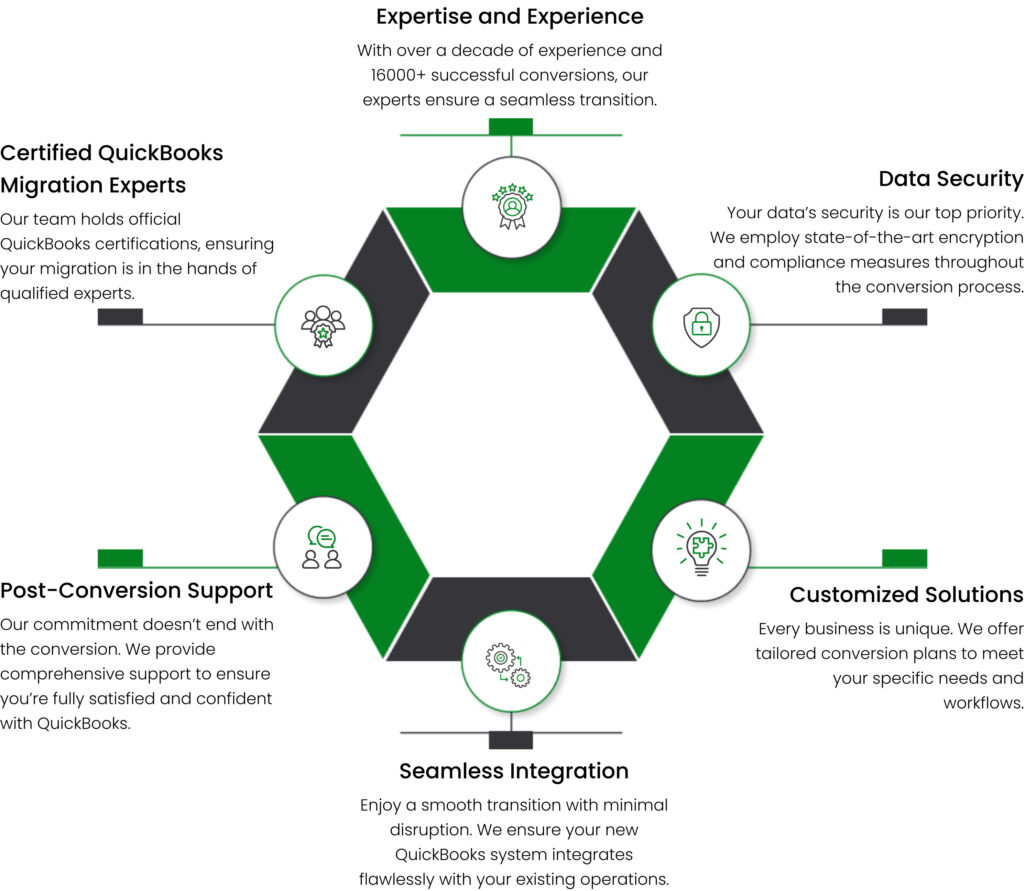
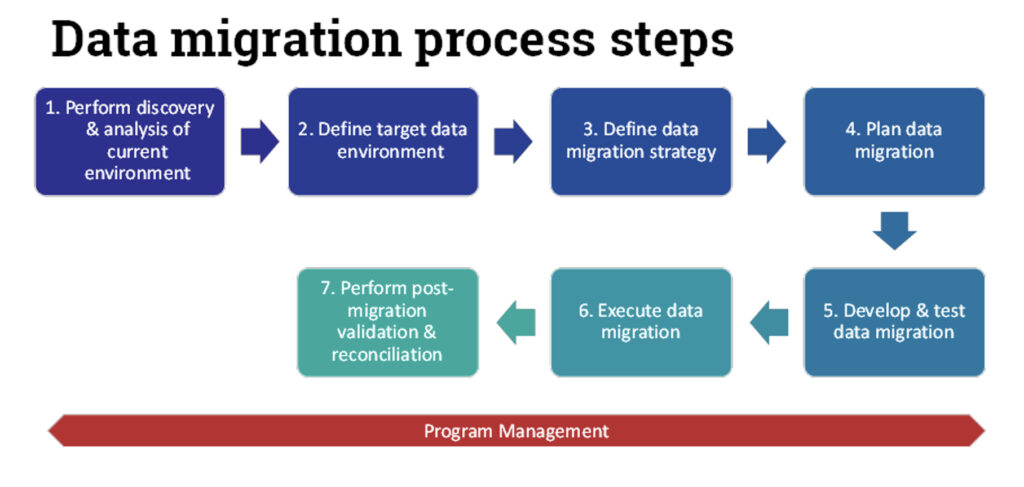
With Migration-tool, you’ll have a dedicated conversion consultant who will assess your specific needs, identify the necessary products, and work with you to develop a phased conversion plan. A team of full-time programmers will manage the export, cleanup, and import of your historical data. Post-conversion, your team will receive comprehensive training on the new system, along with support to establish efficient workflows for maximizing productivity.
Migration Tool for Faster Data Migration
Built on Trust
We ensure that the migration of your critical business history is accurate and seamless, giving you confidence in a complete transfer of all historical data to the new system.
Accelerated Conversions
Accelerate the conversion process to minimize the time spent working in two systems simultaneously, eliminating the need for double entries and streamlining operations.
Support and Training
Proper system setup is key: we ensure that all tables and databases function smoothly, configurations are precise, and bank accounts are linked correctly.
Customizations
Enhance your software’s capabilities by integrating custom modules, marketplace apps, or open API solutions tailored to your business needs.
Optimizations
Trust our experts to troubleshoot and optimize performance, ensuring your system remains fast and efficient at all times.
Keep Your Past Records
Rest assured that all essential historical data is transferred accurately, integrating seamlessly into your new system.
Data Migration and Post-conversion Checklist
Once your case has been reviewed and your data converted, you’ll need to verify that everything has transferred seamlessly and securely. Conduct a thorough check to ensure the data migration is complete and accurate before you start using the online system regularly. This is a good time to make any necessary adjustments and corrections, so you’re ready to enter new transactions smoothly.
Before proceeding with the post-conversion checklist, keep the following points in mind:
- Check your inbox for an email inviting you to log in as the primary administrator of your online account.
- In the email, click on the “Accept” link, which will direct you to the sign-in page.
- Use your login credentials to access the account.
Verify Your Data
Once your data from the desktop version has been successfully converted, it’s essential to validate the information in the online system. Follow these steps to ensure accuracy:
Compare Reports: To confirm that your data is complete and accurate post-conversion, review and compare reports. Print reports from your previous software (such as Sage, Xero, Desktop versions, Kashflow, etc.) and compare them with the reports in your online system. This step is crucial to verify the success and accuracy of the conversion.
Important Note: Check balances in your new system against those in the previous software to ensure accurate reporting. This verification is essential, even if you’re operating on a cash basis, to maintain correct balances and a smooth data migration experience.
Reports to Verify:
- Balance Sheet Report
- Customer Balance Summary – All Dates
- VAT Summary Report for the most recent VAT period
- Trial Balance – All Dates
- Supplier Balance Summary – All Dates
- Any additional reports you find necessary
VAT Notes
Different methods are used for VAT tracking in desktop and online systems. For instance, if a VAT filing is completed but the transaction hasn’t been received or paid before migrating, the amount may shift from the Trial Balance report’s Accounts Payable or Receivable account in the previous software to a suspense account in the online system.
The converted file will not include any existing VAT exceptions. Therefore, if there are exceptions in your previous data, it’s important to contact data conversion support for assistance. Additionally, if your new file contains any uncleared or unreconciled transactions, be sure to unmark these in the reconciliation report to ensure accurate transaction matching.
Validate Company Settings
While data conversion services will transfer your accounting data to the new system, certain company details—like your business name, address, email, and contact information—will remain unchanged. It’s essential to review and update these settings for accuracy:
- Click on the Gear icon and select Accounts and Settings.
- Under the Company Name tab, enter your company’s contact details.
- Ensure the correct email addresses are entered for seamless billing and communication. For system billing, enter the primary email in the Company Email box; invoices for your subscription will be sent to this address monthly.
- If you prefer to use a different email for customer communication, enter it in the Customer-facing Email box. Customers will reach out to this address for business inquiries.
Confirm the VAT Settings
Before you or your clients start using the online system for VAT-related tasks, ensure the correct VAT registration number and filing frequency are set up. If your account is not registered for VAT, you may skip this step.
To verify and adjust VAT settings, follow these steps:
- Navigate to the VAT section.
- Select Edit VAT from the drop-down menu and click Edit Settings.
- Enter your VAT registration number in the VAT Registration Number box.
- Check that the reporting method and filing frequency are correct, making any adjustments as needed.
- Click Save to confirm these settings.
Clean Up VAT
Since the online system assumes that all VAT records are overdue unless filed within the app, it may display an incorrect VAT balance. To ensure accuracy, locate the most recent VAT filing date from your desktop file and enter it, so the VAT balance reflects correctly in future transactions. Here’s how to adjust VAT:
- Go to VAT and click on Prepare Return.
- On the Prepare VAT Return screen, enter the following details:
- Set the Start Date as the start of the conversion period.
- Set the End Date based on the last day covered by the previous VAT return.
- To confirm that VAT returns are filed up to date, select Mark as Filed, then click Continue.
This action will take you to the VAT screen. Here, you’ll need to create a reverse journal entry to ensure the current balance is accurate.
- Go to Bookkeeping and select Chart of Accounts.
- Choose the VAT Suspense Account from the Chart of Accounts and select Account History.
- Next to the VAT transaction you just created, select Edit.
- The journal entry screen will appear; choose Reverse from the bottom menu.
- A new line for VAT Suspense will now appear in the list. Optionally, add a note in the Description column to indicate that this adjustment is part of a post-migration task.
Clean Up Your Bank Reconciliations
Since the online system hasn’t yet been used for bank reconciliation, all prior bank transactions will be marked as unreconciled. To streamline future reconciliations, you’ll need to mark all transactions up to the conversion date as reconciled. This ensures that only new transactions are considered for future reconciliations.
Follow these steps to clean up your bank reconciliations:
- Click the Gear icon and select Reconcile.
- Choose the appropriate bank account from the drop-down menu and select Reconcile Now.
- A “Start Reconciling” box will appear. Enter the date of your last reconciliation in the Statement Ending Date field and the cleared balance from your prior reconciliation in the Ending Balance field.
- Leave the other fields blank, then click OK. A list of transactions will appear on the screen.
- To mark all transactions as reconciled, check the boxes at the top of each column. If transactions are split into two columns, select all transactions in both columns. For any transactions that remain unclear, uncheck their boxes to exclude them from reconciliation.
- When the difference is zero, this indicates that your setup is correct.
- Finally, click Finish Now to complete the process.
Connect Payments and Credits to Open Invoices
During the data conversion, invoices and their respective payments may not have been linked, leaving some invoices marked as open despite having corresponding payments or credits. As a result, you might see names with zero balances in your receivables and payables aging reports in the online system.
To resolve this, link payments to open invoices or enable the automatic credit application feature. Follow these steps to activate auto-apply credits:
- Click on the Gear icon.
- Select Settings and then Accounts.
- Go to the Advanced tab.
- In the Automation section, select Edit.
- Enable the option labeled Automatically Apply Credits.
- Click Save to confirm the changes.
Delete the Intuit Data Services User from the Online Account
After completing data translation services, it’s recommended to remove the Intuit Data Services user from your online account, as Intuit data specialists will no longer need access to your file.
Follow these steps to remove the Intuit Data Services user:
- Click the Gear icon.
- Select Manage Users.
- Locate the data services user you added (identified by an Intuit email address).
- Click Delete next to this user.
System Requirements for a Successful Data Migration
Operating System
Windows 8, Windows 10, Windows 11

Memory (RAM)
512 MB (Minimum Required)

Microsoft .NET Framework
Version 2.0 (Minimum Required)

Processor
500 MHz Intel Pentium II (Minimum Required)

Hard Drive
2.5 GB of Free Space (Highly Required)

Desktop
Pro, Premier or Enterprise 2016 or Higher.
Get instant Support
Live Chat
Get instant replies
Schedule a meeting
Best time to talk
support@migration-tool.com
Get a reply within 5 hours.
